 Clip ( Drawing Editor )
Tool summary :
Also see :
- Drawing Editor (where Clip is a tool)
- Show ( Clip acts on layers marked " Show ")
- Layer Panel (selects layer the optional border is drawn on)
- Unshorten (before using Clip )
- Delete (tool for erasing objects of any type)
- Circle Erase , Label Erase , etc. (to erase objects of specific type)
- Clip Member View (a tool in Modeling -- affects detailing)
Step-by-step instructions :
The following instructions assume that you are using a 3-button mouse, and that you use mouse bindings similar to those shown in the illustrations.
Before using this tool:

1 . Invoke Clip . 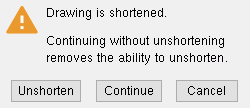
2 . Skip this step if it does not apply. Press the " Unshorten " button to Unshorten . Press " Continue " to go on without shortening. Press " Cancel " to end the operation. See note 2 . 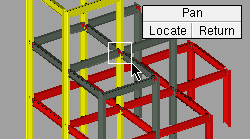
3 . Drag your mouse pointer ( ) while holding down the left mouse button ( Locate ) to form an area box . Release the mouse button when the area you want clipped is in the area box.
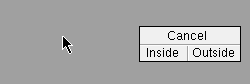
4 . Left-click ( Inside ) erases everything inside the area box. Right-click ( Outside ) erases everything outside of the area box. 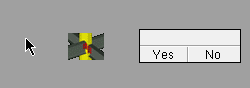
5 . The status line prompts, "Draw a border around the clipped area?" Left-click ( Yes ) draws a border. Right-click ( No ) does not. 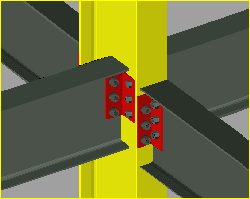
6 . The screen redraws to show the result of the Clip operation. Since the outside option was chosen in step 4 of this example, everything outside the area box is erased. The border is drawn as four lines, which may be edited ▸ Click the Clip icon. The icon can be taken from the group named ' Edit -- Area Mode ' and placed on the ribbon.
▸ Clip can also be invoked using a keyboard shortcut , the context menu , or a mode . For the ' Lightning ' layout style, configuration of the interface is done using Customize Interface .
▸ With Area Mode mouse bindings active, hold down the Shift key and right-click ( Clip ).
Note 2: The warning shown in step 2 would actually not appear on an erection view such as that shown since such drawings are not shortened. Be aware that if you do get this warning and press " Continue ," the clipped drawing cannot be Unshortened at a later time.
Note 3: Right-click ( Return ) in step 3 ends the operation. Middle-click ( Cancel ) in step 4 also ends the operation.

bindings , step 3

bindings, step 4 Tips: At this point you can still undo your changes by using Revert or Undo . If you Save to make your changes permanent, you will no longer be able to Revert , but you can still Undo . You may want to Save As to save under a new name the changes you have made using Clip . But please note that you cannot Save As if your current drawing is a submaterial or an erection view . To keep a copy of the changes made to a submaterial or erection view, use Save Standard Detail .

